Introduction
Microsoft Azure allows for sign-in web page customization for particular branding. If the organization has many programs, they may want the company’s look and experience displayed on their sign-in for the organization's programs. There might be numerous goals at the back of this, together with advertising and marketing. Companies that use Azure Active Directory for identification control can do it by way of customizing the advent of the sign-in page. The Sign-in web page customization function is to be had for simple and top-class versions of Azure Active Directory. You can’t find this inside the loose version. If you want to add your precise brand page its seems like your corporation. In this demo, we will learn how to create a particular branding sign-in page in Azure.
Customize Branding
Before moving forward, ensure that the pictures (emblem, historical past, rectangular heritage) you need to show at the sign-in web page are of the correct size and dimensions. If you don’t deal with this, you'll waste time importing pictures, and in the end will find that the branding adjustments are not carried out.
Step 1
Log in to the Azure AD portal.

Step 2
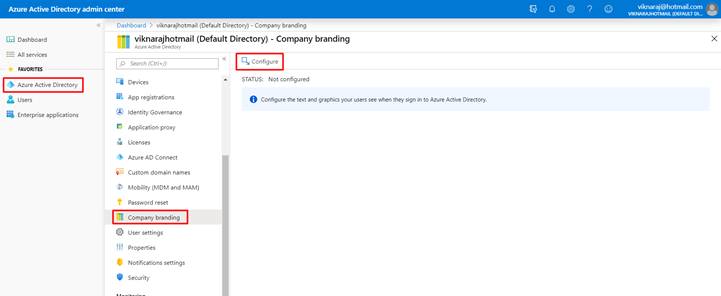
Go to the “Azure Active Directory” and then select “Company branding” under Manage, then click “Configure”.
Step 3
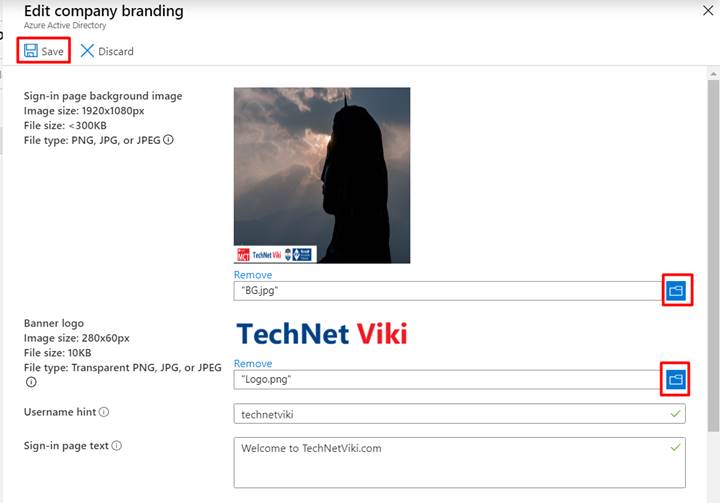
In the Configure company branding, Upload the Background image that will appear on our sign-in page, the Image size is “1920 x 1080px”. Upload the Banner Logo of your organization as well. The logo size is “280 x 60 px”. You can also fill the rest of the details based on your needs.
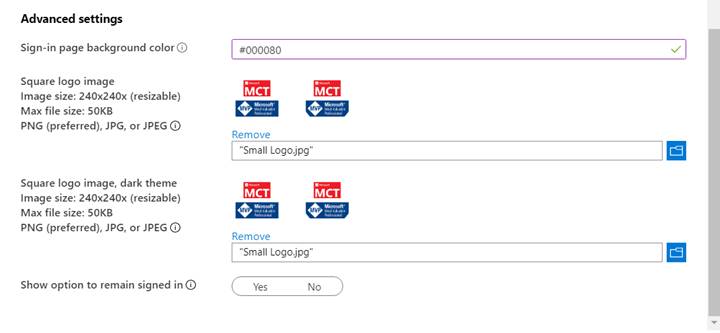
In advanced settings, we can define the background color for our sign-in page using RGB hex code format. The background color is used when the background image could not be uploaded.
Step 4
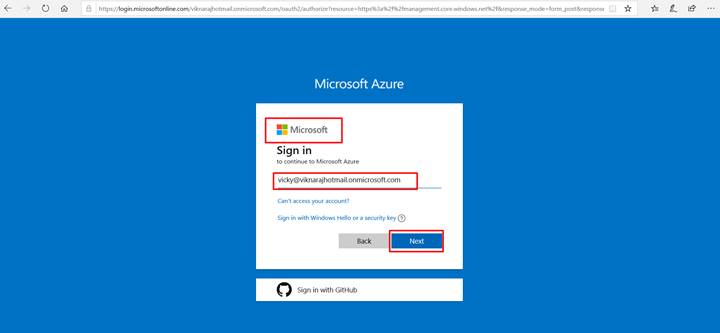
Now we are going to sign into our page using the following address:
- https://portal.azure.com/<yourdomainname>
- https://aad.portal.azure.com/<yourdomainname>
In our scenario, our address is here.
This time, our page Log is the default and our Background color is changed to what we have added. When you click next, it will automatically change, so click “Next”.
Step 5
Now we can see that our Brand is changed.
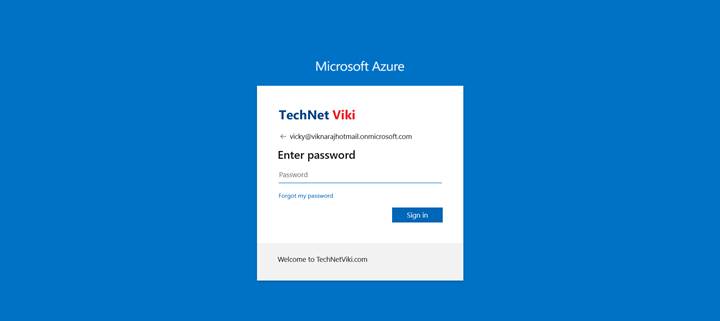
Step 6
We can verify that our logo and Backgrounds we already uploaded have changed.
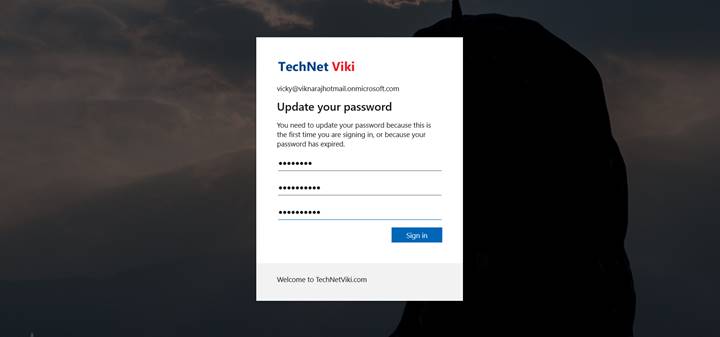
Summary
In this demo, we have learned how to configure Sign-in page customization for specific branding using our company image, if you have any questions, feel free to comment below.


