How To Manage Our Blob Storage Account Using Logic Apps
Introduction
The Azure Logic Apps help us to automate our workflows and it integrates data across Azure services. In this demo, we are going to learn how we can build a logic app that when the user uploads the files into the storage account the logic apps sent the email to the user with the file name. The Azure Blob Storage is the new storage future in the Logic Apps, this future recently added to the Azure Logic Apps.
Step 1
In the “articledata” storage account Click Container to we need to create a container.

Step 2
In the articledata – Container Click “+ Container”, enter the name “mydata” for the container and select the Public Access Level to “Container (anonymous read access for containers and blobs) and then click “Ok ”/


Now we have created the Container named “mydata”
Step 3
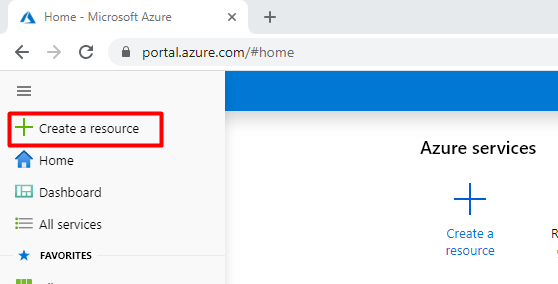
In the Azure Portal Click the “+Create a resource”, and then enter “Logic App”
Step 4
In the Logic App page click “Create” to deploy the Logic App.

Step 5
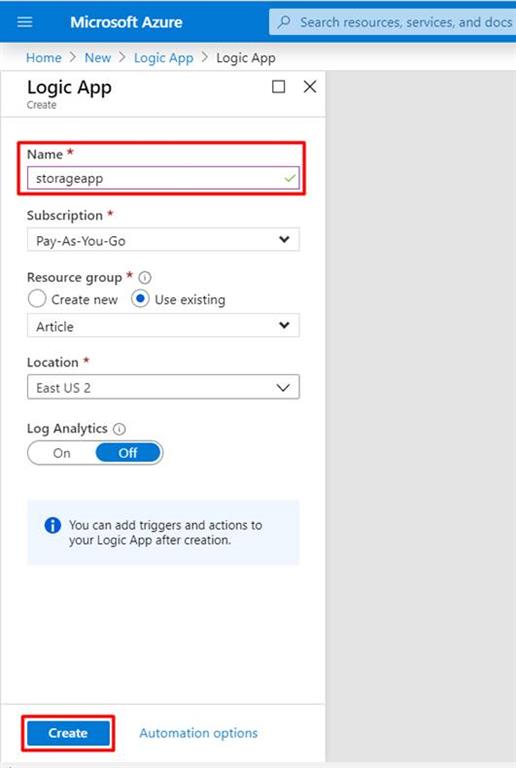
In the create Logic App, enter the name for the logic app. In this demo our logic app's name is “storageapp”. Choose the existing resource group, when you select the resource group the Location is automatically selected and then click “Create” button to start the process.
Step 6
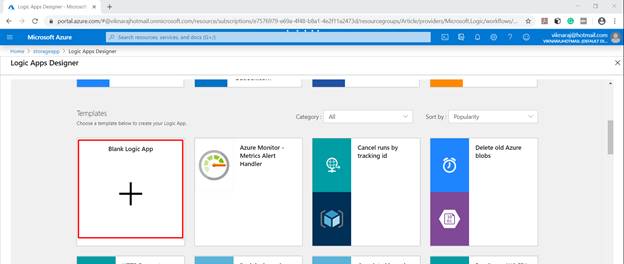
After successfully creating the Logic App, select the Logic App and then Click “Blank Logic App”
Step 7
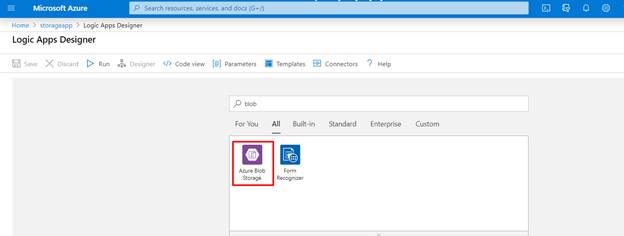
In the Search box enter the name “blob”, and then click “Azure Blob Storage”.
Step 8
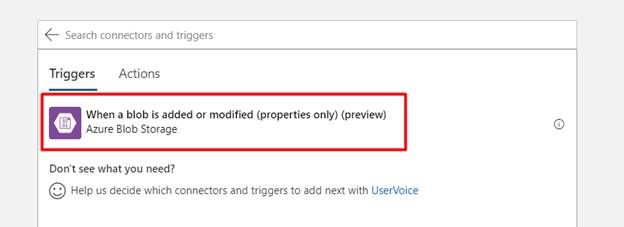
After selecting the Azure Blob Storage, we need to select the Triggers, so select “When a blob added or modified (properties only)”.
Step 9
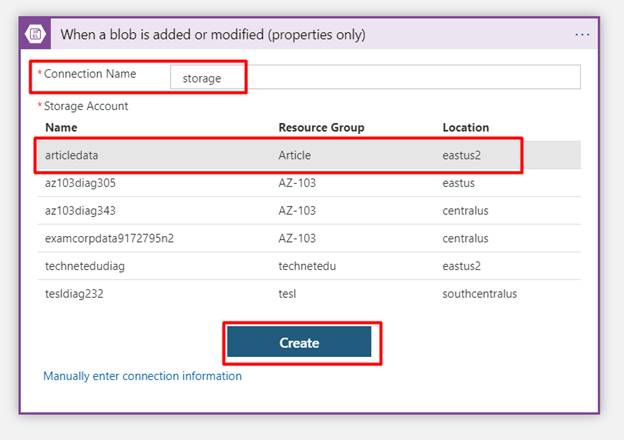
Enter the Connection Name in this demo our connection name is “storage” and then select Storage Account, so our demo storage account name is “articledata”, and then click “Create”.
Step 10
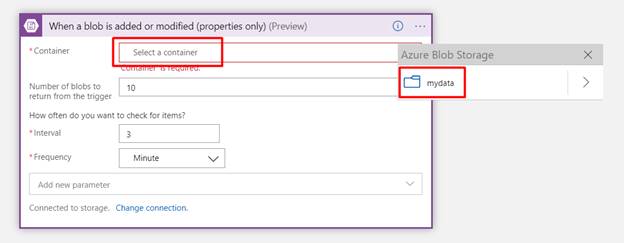
In the Blob App, select the container in this demo our container name is “mydata”, and then we can select Interval time and Frequency as we want.
Step 11
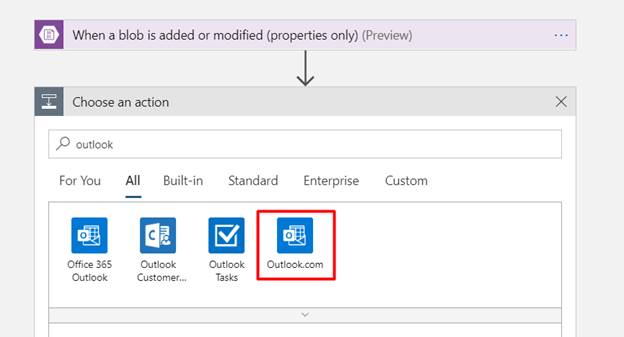
In the Next Action search outlook and Click “outlook.com”
Step 12
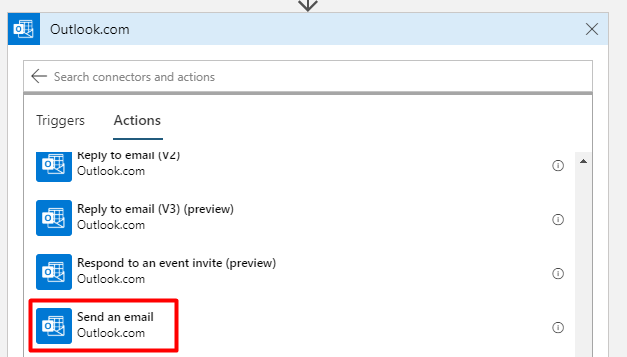
In the Outlook.com, Select “Send an email”
Step 13
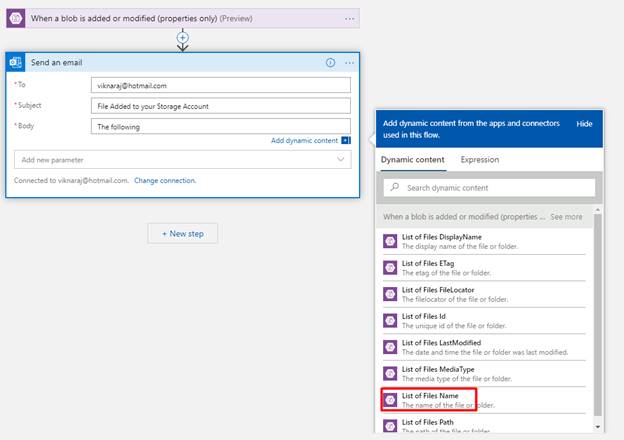
In the Send an email window, enter the email address that we need to send the email notification in the “To” text box, enter the Subject, and then Enter the Body, in the body part we can define the variable like “List of Files Name”.
Step 14
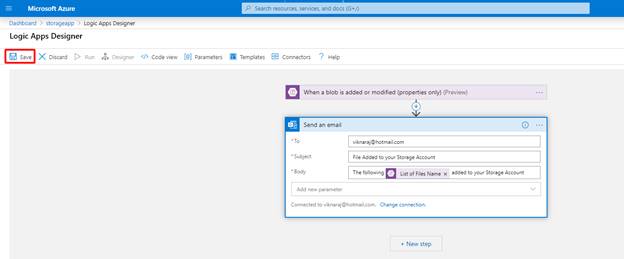
After successfully defining the parameters, click “Save”.
Step 15
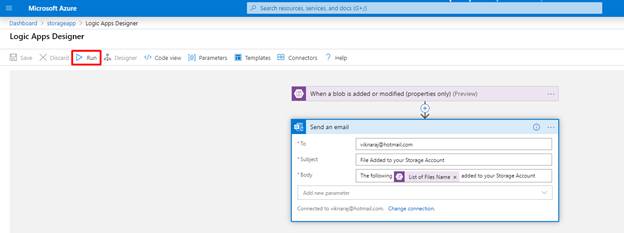
After successfully saving the App, click “Run” to start the Logic App.
Step 16
Now we can upload the file in the “mydata” container, Click “Upload”, then choose the file and then Click “Upload” now the file named “About Viknaraj.jpg” has been uploaded to our container.

Step 17
Now we can verify our Inbox, that we have received an email that ”The following About Viknaraj.jps added to your storage Account”.

Summary
In this demo we have learned how to configure Storage monitoring services using Logic Apps. If you have any questions, feel free to comment below.


No comments:
Post a Comment